owl

Background Image - Ladybug

Follow Me Frame

Follow Me Frame

More to see

More to see

Translation Button

Welcome ladybug

Welcome ladybug

Thanks for stopping by

Thanks for stopping by. Hope you enjoy your stay!

I've noticed that I have visitors from all over the world. To make your stay more enjoyable, I have added a "translator" for you.


Thursday, February 14, 2013

Hubby’s Valentine Card


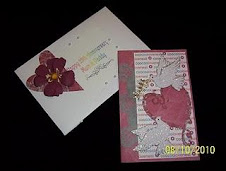
Firstly, yes there are male ladybugs; hence, this cute li’l “love bug” valentine for my hubby!  He’s my “love bug” of 35 yrs.  J

Created a shape card by putting two hearts together and attaching at the top.  Easy peasy!!  This was a fun card to put together, because of the fun shapes.

 Inside:-
Envelope front:- 
Envelope back:-

 
Tools/Items:-
Cricut Imagine
Cricut Cartridges – see below
Cardstock -- white (for the Imagine)
Glue – ATG; Zig Two-Way
Rhinestones
Pop Dots

Cricut Cartridges:-
Wild Card – envelope; heart w/ holes; cascading hearts; “Be My Valentine” sentiment
Love Struck – base card w/ heart layers
Create a Critter – ladybug & layers; “Love bug” sentiment

He absolutely loved his card and that's what made it extra special to me. J


Tuesday, February 12, 2013

Cricut Circle Member


I now belong to the Cricut Circle Club.   WhoooHoooo!   I never thought in a gazillion years that I would become a member because it was very costly when it first began.  But now Provocraft made it that you can use your Cricut Reward points (3000) to become a member.   If you’re unfamiliar w/ how the club works:-

This yearly membership includes:
  • Cartridge of your choice offered for membership
  • 10% off of all purchases made on Cricut.com
  • Free shipping on orders over $50 made on Cricut.com
  • Exclusive promotions on Cricut.com
  • Double reward points for purchases on Cricut.com
In anticipation of becoming a member, I made my very own Cricut Circle emblem/thingie.

How this all started was I was soooo excited about becoming a Circle Member that I literally drove my hubby nuts by me chanting:-  “I’m a Circle Member.  I’m a Circle Member”.  He retorted w/:-  "I’m going to call you 'Loopy' from now on."   J
Hence, me getting a “Circle/Loop” to make into an Circle emblem/thingie.

I started w/ an unfinished plant stake that had a chalkboard in the circle part.  I painted it Cricut green.  Actually the real color is "Apple Orchard" from Plaid.  I looked up the color on the Net to get the RGB codes for it.  Then I utilized my Cricut Imagine for the RGB codes and flood-filled the Cricut circle rim w/ the color.  It was a bang-on match!!!  I cut the shape out numerous times to make it sturdier and even flipped the image so the back of the circle-rimmed shape was green, too.  Very pleased how it all turned out.  J


Attached a blinged-up crown on her head, added gems around the face perimeter, and a bow for the final touch.  The gems mimic the colored polka dots in the bow.  Wrote “Circle Member” w/ chalk on the board.  


Here she is in all of her glory:-


I think she’s looks pretty divine, eh?   Now, I don’t have to keep chanting that I’m a Circle Member.  I can just look at my Circle Club emblem/thingie and I know that I am.  LOL

Tools/Items:-
Cricut Imagine
Cricut Cartridges – see below 
Cardstock -- white (for the Imagine)
Glue – Aleene’s All Purpose Tacky
Ribbon – pink/green/blue/purple polka-dotted
Rhinestones (various shapes/colors)
Pink chalk

Cricut Cartridges:-
Cricut Everyday (Cricut head)
Life’s a Party (crown)


Saturday, February 9, 2013

I didn't win the Teddy Bear contest :-(

But . . . I came in 2nd place, which is still an honour!!!  Thank you soooooo much for all of your votes!!  J

Here's the ranking:- 


Sunday, January 27, 2013

Please vote for me!!!

Hiya

I entered a Teddy Bear contest and I would love for you to vote for my teddy bear.  :-)

Go to this website:-
http://melodylanedesigns.blogspot.ca/2013/01/naked-teddy-bear-parade-contest.html

Scroll down where you will see a contest with a bunch of teddy bears.  You can only vote ONCE, so I hope you vote for my teddy bear. :-)  The names aren't shown so you'll have to look for this one:-


It's a Ladybug Teddy Bear.  I wonder why that would be, eh?  LOL

Mine is VERY different in that I didn't just use a teddy bear from the Cricut Teddy Bear cartridge.  I improvised and created my 
Ladybug Teddy Bear by using two cartridges, and fussy-cutting to make it my own.  J

I'd sure appreciate your vote!! :-)  You can find her:-

3rd row, second from the left.

at:

p.s.  The contest ends Feb. 2/13.


Saturday, January 19, 2013

Latest Cricut Cartridge CheckList - January 2013


Hiya !


Provocraft released  a new cartridge:-
Cricut® Outdoor Man

Here’s a sampling of what’s on this cartridge:-


Here's my latest checklist:-


Just to remind you that, when you click on the Cartridge name in the CheckList you downloaded, it will link directly to the Cricut website, whereby you can see more info about the cartridge(s).

My Checklist consists of 5 different tabs in the Excel Spreadsheet (Workbook):-

* Cricut Everyday carts
* Cricut Events
* Cricut Imagine
* Cricut Lite
* Cricut Projects

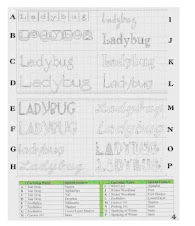
For newbies to my Cartridge Checklist, here's what it looks like:-


Please note: this Checklist does not include the digital cartridges. 


Enjoy! 


Tuesday, January 15, 2013

Teddy Bear Ladybug


I just got one of the cutest Cricut Cartridges ever ---- Teddy Bear Parade.  The teddy bears are just toooooo stinkin’ cute!   There are 50 bears total.


Even tho they are adorable, there wasn’t a Ladybug teddy bear, so I set off to create one myself.

I started w/ a Teddy Bear body, cutting the arms off. Then I used the Ladybug body, face, wings & antennae from the Create a Critter cartridge. I had to snip here and there, but I think she turned out pretty nice. Heck, she's just tooooooo stinkin' cute --- is what she is. J

Here she is, in all her glory:-


I put her on a “thank you” card that I’ll be sending to a dear MB friend, who did something nice for me.  Hope she likes it!! 


Inside:-


Tools/Items:-
Cricut Expression
Cricut Cartridges – Teddy Bear Parade; Create a Critter
Cardstock -- white (for the card); black, red, beige
Patterned paper (for background, layers)
Martha Stewart Deep Edge Punch:-  Monarch Butterflies Trim
Glue – ATG; Zig Two-Way
Stickles – Candy Cane
Sharpie - ultra fine point (for faux stitching)
Googly Eyes


Wednesday, January 9, 2013

Thank You card for Hubby


Made this card for my sweet hubby, who gave me an amazing Christmas.

Inside:-

Used the Imagine More Cards cartridge for the li’l cow and sentiment. Used Elegant Edges for the frame around the sentiment and the lacy background.

Everyone knows that cows are glittered so just had to Stickle ‘em.  LOL  Added rhinestones for some bling.

The inside sentiment was computer-generated.  The background was created using the Martha Stewart Punch Around the Page.

Tools/Items:-
Cricut Imagine
Cricut Imagine Cartridge – Imagine More Cards
Cricut Cartridge – Elegant Edges
Cardstock -- white (for the Imagine)
Martha Stewart Punch Around the Page:-  Bubble Bath
Glue – ATG; Zig Two-Way
Stickles – Cinnamon
Rhinestones
Pop Dots


FeedJit Live Traffic Feed

Thank you for visiting ladybug

Thank you for visiting ladybug

Birdie thank you

Birdie thank you