owl

Background Image - Ladybug

Follow Me Frame

Follow Me Frame

More to see

More to see

Translation Button

Welcome ladybug

Welcome ladybug

Thanks for stopping by

Thanks for stopping by. Hope you enjoy your stay!

I've noticed that I have visitors from all over the world. To make your stay more enjoyable, I have added a "translator" for you.


Showing posts with label MS - Swirling Lace. Show all posts

Monday, November 22, 2010

Punch All Over the Page Aperture Card

Greetings everyone. This card was inspired by our latest beautiful weather. We got snow!!! :-)

Do you 'member a while back when I used the Martha Stewart Circle Cutter to cut various sized circles and then used the Swirling Lace corner punch all around it? See below.

Well, I thought how about using the Punch All Over the Page (PAOTP) on one of those circles. So, I chose the 3" circle, and used the Rose Window PAOTP.

Can you see a li'l white semi-circle shape in the bottom of the PAOTP circle? TBA later. :-)


The card base is 5" x 10", folded. The top layer is 4.75" square. Used the Snow Flakes Cuttlebug folder. Used the PAOTP through both the cardstock and patterned paper on top. Didn't place exactly in the centre -- a little more to the top of the card. Attached the PAOTP 3" circle.

Well, let's see what that li'l semi-circle shape might be:-
It's a li'l snowman peeking through! :-)

Used the Snowflakes Cuttlebug folder on the inside of the card, and then utilized the plastic that houses a Cricut cartridge, for the "window" effect.

Used the DecoArt Snow Writer on the white ripped paper. See how it sparkles? There are various Snow Writers --- one that's just plain white and this one, which glistens.

Pop-dotted the snowman on top and added a computer-generated sentiment.

RECIPE

Tools/Items:-
Glue (regular & ATG)
Patterned Paper
Cardstock
MS Punch All Over the Page – Rose Window (centre of card and circle)
MS Corner Punch – Swirling Lace (around the circle)
Cuttlebug folder – Snowflakes
DecoArt Glistening Snow Writer – snow
Cricut cartridge packaging – window
Pop dots – snowman
Sentiment – computer generated

Love how I can now make "aperture" cards --- anywhere on the page, thanks to the MS Punch All Over the Page punches!!

Saturday, November 13, 2010

"Iris Folding" using Punch All Over the Page

Happy week-end everyone. Sorry I haven’t been around for a couple of days but, not only was I having “printer” problems, I was also having probs. w/ my camera. Nothing was working the way it should’ve. :-( Finally got everything fixed, so now I can post the other “project” I had prev. mentioned.

When I FIRST saw the Punch All Over the Page punch, my li’l mind immediately zeroed in on doing “Iris Folding” w/ it. If you’re not familiar w/ this technique, I’ve included instructions.
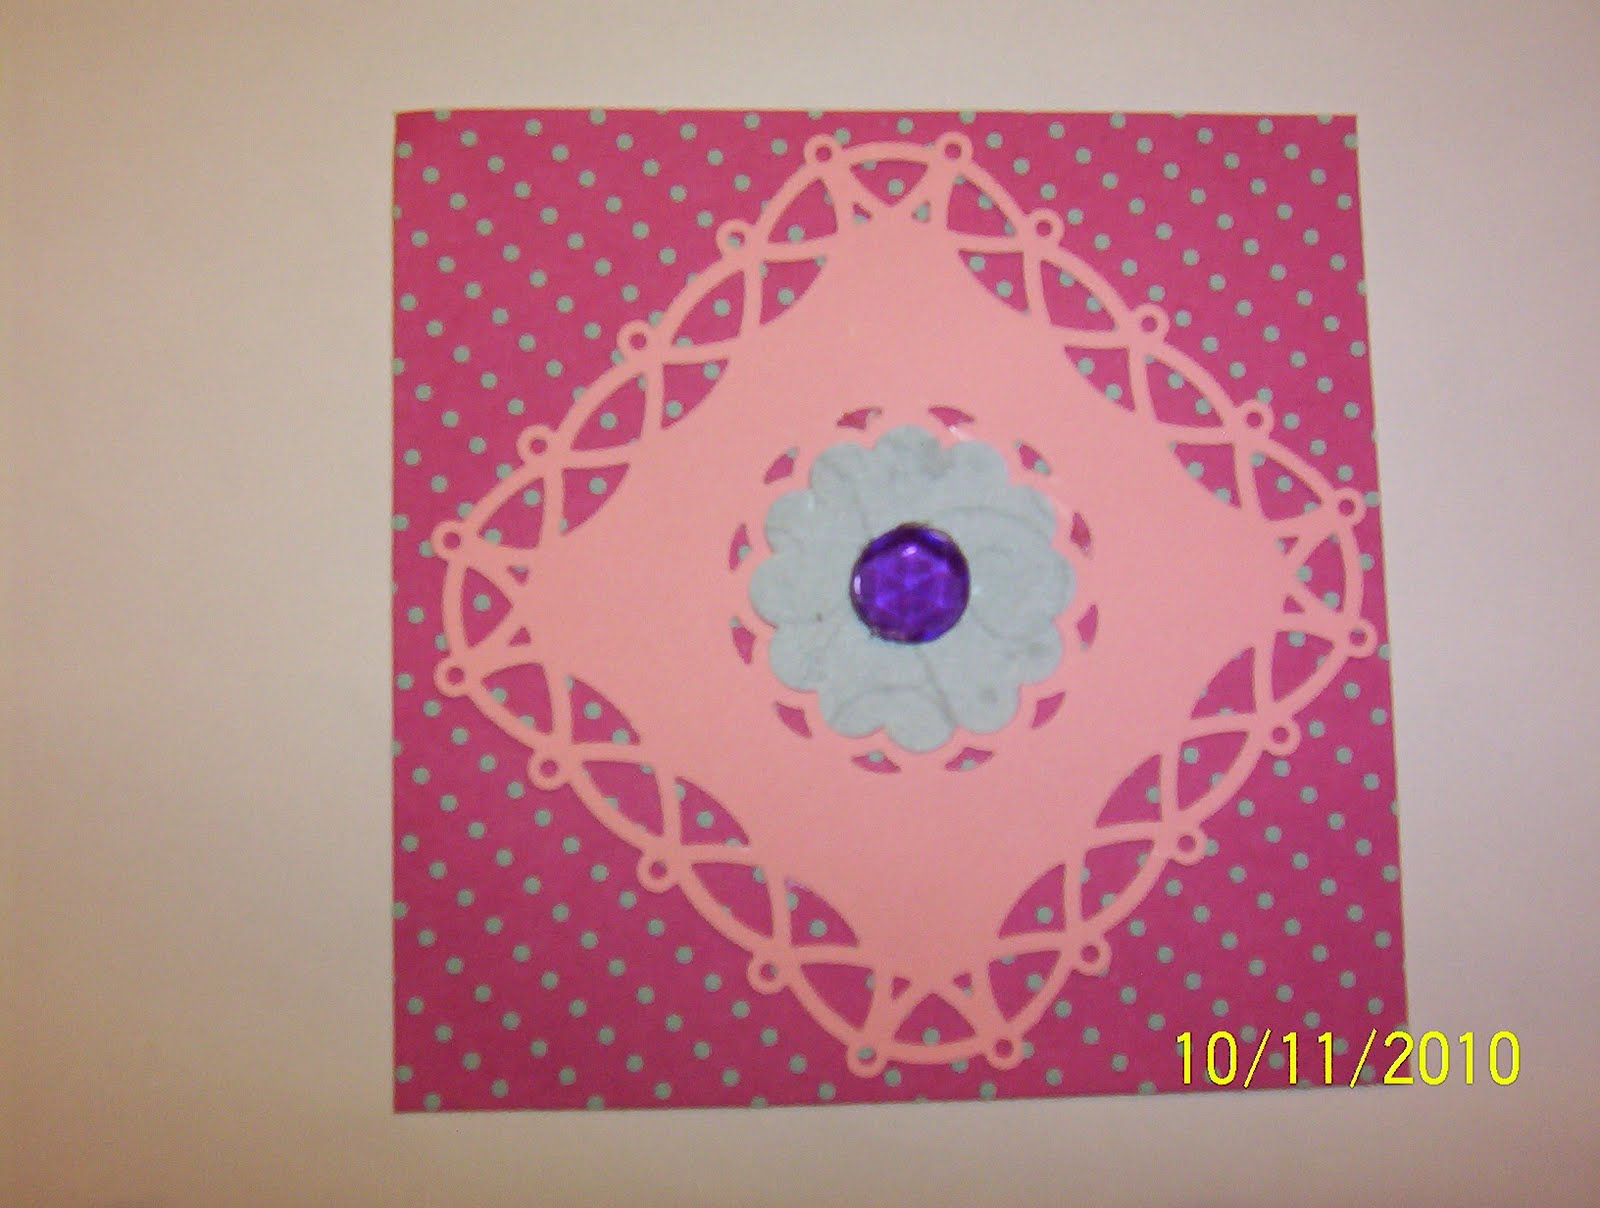
Here’s my outcome:-


RECIPE:-

Tools/Items:-

Punch All Over the Page:- Rose Window
Corner Punch:- Swirling Lace
Martha Stewart Score Board
Glue:- ATG
Cardstock
Patterned Paper
Corner Rounder
brad (for centre)
Iris folding template (which I've included)

Card base is 5” x 10”, folded. First layer is 4” x 4”, punched w/ the Swirling Lace corner punch. Top layer is 3 ¼” x 3 ¼”, punched w/ the Swirling Lace corner punch. Centre punched w/ the Rose Window punch. Then the Iris folding.

Instructions:-

Iris folding refers to a technique where folded strips of colored or patterned paper are layered in a spiral pattern behind an aperture. It is called Iris Folding because it resembles the iris of a camera.

There are several free iris folding templates on the Internet.

To make your iris folded greeting card, you will need:

* scissors
* scraps of decorative paper in various colors, cut in 1" strips, and folded in half lengthwise. This is where my scoreboard came in really handy!! :-) Some instructions say to cut the strips into 1"x3" strips, but I like to leave it in a long strip and then just cut off the lengths I need, as I go.). * Scotch tape
* colored cardstock.
* a template or pattern for cutting an aperture in the colored cardstock. (A Coluzzle, Sizzix, or Cricut also work very well for this.) But I used the new Punch All Over the Page punch. Yeah!!! Martha!! for creating this li’l gem!
* Iris folding template


Step 1
Cut out an aperture in the colored cardstock.

Step 2
Position the card with the aperture cut-out over your iris folding template, face down. You will be working on the back side of the card.

Step 3
Tape the card to the template using non-permanent tape. Masking tape works well for this.

Step 4
Arrange your folded strips of paper in the order that you want to apply them to the card.

Start with #1 on the template:
* Cut a strip of paper so that it is a little longer than the aperture opening.
* Line up the folded side of the strip of paper with the inside edge of the area labeled with a "1".
* Tape both ends of the strip of paper to the back of the card.

Step 5
Using the next color, follow the same instructions for #2. Repeat all the way around the aperture, following the numbers and working inward as you complete each round. Stop when you have the desired size for the aperture opening.


The back of the card will look quite messy as you progress, but when you flip the card over it should look something like this:


Step 6
To finish the center attach a small picture, a decorative button, etc. You can now mount your finished work using glue or double-sided tape.

Here's the template I used for my project:-


I tried to copy/paste the actual size one that I used but it wouldn't let me, for whatever reason. So, you'll have to resize it to 1 1/4".

Note: when you resize it to that teeny weeny size, you may not be able to see the numbers, which was the case for me and my dwindling eyesight. If you keep the large size template, as a guide, you'll be "good to go".

Hope you enjoyed my creation.

Wednesday, November 10, 2010

Martha Stewart Punch All Over the Page

Well, I had a lot of fun playing w/ my new toy that Martha Stewart Crafts sent to me. :-)

Instead of making cards this time, I decided to just make card toppers, giving you some different ideas.

Most of the designs, w/ the exception of one, started by using a Punch Around the Page on a 3 ¼” square, layered onto a 3 ½” square. Each time, I used the Rose Window Punch All Over the Page punch in the centre. Here are the particulars:-

Punch Around the Page: Snow Flurry
Centre:- Poinsettia embellie


Punch Around the Page: Swirling Lace (the one that 10 lucky gals won!) :-)
Centre:- flower w/ brad


Punch Around the Page: Scallop 3-dot
Turned it on its side (to form a diamond)
Centre:- design on patterned paper

See below for the patterned paper I started with. Depending on what patterned paper you use, you can get some neat effects.


Here, I’m showing how easy it was to create a row of 2 punch-outs on 2 rows; hence 4 punch-outs.
Centre: glittery snowflakes
Punch Around the Page: Quilted
Centre:- used the cutout from the 4 punch-outs (above), topping w/ a rhinestone


It was the first time I noticed that there was a different looking corner on the punch set. Even tho the instructions read:- Position top over the paper so that the flat corner matches up w/ the corresponding one on the base, it really didn’t sink in what that meant. Now I know. LOL
Here’s a pic to explain it a li’l bit better:-


Martha and her creators thought of everything!!! WTG!!!

Also, w/ all of these punches, you’re left w/ other li’l embellies. W/ this punch, I’m left w/ 1 ¼” scallop circles. I don’t have a scallop punch so this is an added treat. W/ the butterfly one, you’ll have li’l butterflies. W/ the heart one --- hearts. W/ the star one --- stars. You get the idea! :-)

I have another idea in mind to show you, but this is going to take a li’l time to create. Stay tuned. :-)

Saturday, October 23, 2010

All Occasion Card

Here’s another card, using the circle “thingie”. (Don’t know what else to call it!) :0)
But I added some li'l corner cuts. (instructions below)

Here are 3 different size circles, cut w/ the Martha Stewart Circle Cutter:- 2", 3" and 4", using the corner punch around the perimeter. I chose the 4" for this card, but just wanted to show the variety of sizes.

RECIPE:-
Martha Stewart Punch Around the Page:- Swirling Lace Martha Stewart Ladybug punch - ladybug
Martha Stewart Circle Cutter - circles
Cardstock
Glue- ATG and Zig Two-Way (for smaller items)
Stickles – Magenta
Ribbon


The card base is 5.25” x 10.5”, folded. The layer is cut at 5”, using the corner and border punches.

This time the circle was cut, using the MS Circle Cutter, at 4”, cutting around the circumference using the corner punch. Then I cut, separately, 4 corners to attach underneath the circle, just to jazz it up a li’l. Here’s how I did that:-


Then, inserted them on the 4" circle.....

Cut another circle 2 ¼”, adhering to the first one. The patterned paper has a flower on it. Now, what should go on top of the flower?? Well, that’s a “no-brainer” for me ---- a li’l ladybug, of course. :-) Soooo, used the Martha Stewart Ladybug punch and pop-dotted it on. Added a bit of Stickles.

If you click on the picture, it will enlarge and you’ll be able to see the card in more detail. Can you see the li’l ribbon I wove thru the lace? It’s a “sparkly” ribbon w/ both of the colours of the layers.

There are just sooooooo many things you can do with the MS Punch Around the Page punch sets. Hope I’ve given you lots of ideas.

I’d love to see your creations. Just leave me a comment on my blog and I’ll make a point to visit yours! :-)

Thursday, October 21, 2010

Quick Thank You Note Card


Thanks to the Martha Stewart Punch Around the Page punch set, you can make a quick note card, before you can say:- Supercalifragilisticexpialidocious :-)

RECIPE:-

Martha Stewart Punch Around the Page:- Swirling Lace
Martha Stewart Score Board
Martha Stewart
Circle Cutter
Cardstock
Studio G stamp – “thank you”
Ink
Flower
Brad
Glue- ATG

The card base is 3.25” x 8.5”, folded. Cardstock (blue) is 1.5” x 4.25”, using the border punch. I scored three lines, using the MS Score Board. LOVE that scoreboard, as I don’t have the Scor Pal. And. . . . .the MS Score Board has the 1/8" increments, where the Scor Pal doesn’t. Ooops, sorry I digress. :-) Can you tell how much I love my MS Score Board? (tee-hee)

The circle “thingie” was cut using the MS Circle Cutter. I cut a 2” circle (cut like buttah!!!) and then used the corner punch around the circle. Added a li’l flower, via a brad.

Stamped “thank you”. Voila, you have a quick card.

Wednesday, October 20, 2010

Monogrammed Note Card

Here’s a monogrammed notecard I made, using the MS Punch Around the Page set. Very simply made, as I’m just showing you the “basics” in my following posts. There are endless possibilities for creating cards and LO’s w/ the Martha Stewart Punch Around the Page punches. Let your imagination run wild!! :-)


RECIPE:

Martha Stewart Punch Around the Page:- Swirling Lace
Cardstock
Glue- ATG and Zig Two-Way (for smaller items)


The card base (blue) is 6” x 8 ½”, folded. The top layer (white) is 4.25” x 6”, using the MS border punch on a portion of the bottom. The medallion is cut using a 2” square, using the corner punch. Inserted chipboard “N” in center.

Love that medallion!! Just think what other Martha Stewart corner punches would look like, as a medallion! :-). {Hmmmmm, as a treat, and seeing as I have a whole slew of these li'l critters, I'll punch a bunch and show you, at the end of showcasing this particular punch set. :-) }

Using the corner punch, I punched the folded top edges of the card. If you’d like to know how to do this, here’s how:-

* Line up the open arm of the corner punch to the edge of the paper and silver line, to inside fold. Here’s a pic to further demonstrate:-


You are more than welcome to leave comments on my "card posts", but please make sure you leave your comment, to enter to win this Punch set, on this blog post:-

Tuesday, October 19, 2010
Martha Stewart Punch Set GIVE-AWAY

Tuesday, October 19, 2010

Thank You card....

Top o' the morn. to ya!!! I’m feelin’ a bit “punchy” today. I think I’ve had tooooo much eggnog! :-)

Here’s a really quick card I created, using the latest Martha Stewart Punch Around the Page set, that the hubster bought for me. (He’s such a sweetheart, eh?) And. . . . .he even put up some more racks, for me to put my punches on. :-)


RECIPE:

Martha Stewart Punch Around the Page:- Swirling Lace
Studio G stamp – “thank you”
Ink
Glue- ATG and Zig Two-Way (for smaller items)
Cardstock
Corner rounder
Flowers
Seed beads

The card base is 5” x 10”, folded, which makes a 5” square card. The first layer (blue) was cut using a 5” square, punching all around, using both the border and corner punches. The second layer (white) was cut using a 3.25” square, punching all around, same as first layer.

Rounded the corners. Added li’l flowers and seed beads. Stamped “thank you” in the center. Easy peasy.

FeedJit Live Traffic Feed

Thank you for visiting ladybug

Thank you for visiting ladybug

Birdie thank you

Birdie thank you