owl

Background Image - Ladybug

Follow Me Frame

Follow Me Frame

More to see

More to see

Translation Button

Welcome ladybug

Welcome ladybug

Thanks for stopping by

Thanks for stopping by. Hope you enjoy your stay!

I've noticed that I have visitors from all over the world. To make your stay more enjoyable, I have added a "translator" for you.


Showing posts with label All Occasion. Show all posts

Saturday, October 23, 2010

All Occasion Card

Here’s another card, using the circle “thingie”. (Don’t know what else to call it!) :0)
But I added some li'l corner cuts. (instructions below)

Here are 3 different size circles, cut w/ the Martha Stewart Circle Cutter:- 2", 3" and 4", using the corner punch around the perimeter. I chose the 4" for this card, but just wanted to show the variety of sizes.

RECIPE:-
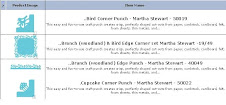
Martha Stewart Punch Around the Page:- Swirling Lace Martha Stewart Ladybug punch - ladybug
Martha Stewart Circle Cutter - circles
Cardstock
Glue- ATG and Zig Two-Way (for smaller items)
Stickles – Magenta
Ribbon


The card base is 5.25” x 10.5”, folded. The layer is cut at 5”, using the corner and border punches.

This time the circle was cut, using the MS Circle Cutter, at 4”, cutting around the circumference using the corner punch. Then I cut, separately, 4 corners to attach underneath the circle, just to jazz it up a li’l. Here’s how I did that:-


Then, inserted them on the 4" circle.....

Cut another circle 2 ¼”, adhering to the first one. The patterned paper has a flower on it. Now, what should go on top of the flower?? Well, that’s a “no-brainer” for me ---- a li’l ladybug, of course. :-) Soooo, used the Martha Stewart Ladybug punch and pop-dotted it on. Added a bit of Stickles.

If you click on the picture, it will enlarge and you’ll be able to see the card in more detail. Can you see the li’l ribbon I wove thru the lace? It’s a “sparkly” ribbon w/ both of the colours of the layers.

There are just sooooooo many things you can do with the MS Punch Around the Page punch sets. Hope I’ve given you lots of ideas.

I’d love to see your creations. Just leave me a comment on my blog and I’ll make a point to visit yours! :-)

Wednesday, October 20, 2010

Monogrammed Note Card

Here’s a monogrammed notecard I made, using the MS Punch Around the Page set. Very simply made, as I’m just showing you the “basics” in my following posts. There are endless possibilities for creating cards and LO’s w/ the Martha Stewart Punch Around the Page punches. Let your imagination run wild!! :-)


RECIPE:

Martha Stewart Punch Around the Page:- Swirling Lace
Cardstock
Glue- ATG and Zig Two-Way (for smaller items)


The card base (blue) is 6” x 8 ½”, folded. The top layer (white) is 4.25” x 6”, using the MS border punch on a portion of the bottom. The medallion is cut using a 2” square, using the corner punch. Inserted chipboard “N” in center.

Love that medallion!! Just think what other Martha Stewart corner punches would look like, as a medallion! :-). {Hmmmmm, as a treat, and seeing as I have a whole slew of these li'l critters, I'll punch a bunch and show you, at the end of showcasing this particular punch set. :-) }

Using the corner punch, I punched the folded top edges of the card. If you’d like to know how to do this, here’s how:-

* Line up the open arm of the corner punch to the edge of the paper and silver line, to inside fold. Here’s a pic to further demonstrate:-


You are more than welcome to leave comments on my "card posts", but please make sure you leave your comment, to enter to win this Punch set, on this blog post:-

Tuesday, October 19, 2010
Martha Stewart Punch Set GIVE-AWAY

FeedJit Live Traffic Feed

Thank you for visiting ladybug

Thank you for visiting ladybug

Birdie thank you

Birdie thank you