
 inside:-
 Tools/Items:-
Cricut Imagine
Cricut Imagine Cartridge – Yummy
Martha Stewart deep edge punch – Daisy Fan
Martha Stewart border punch - presents

Clear Stamp
Glue – regular; ATG
Cardstock
Patterned Paper
Corner rounder – Corner Stone by EK Success

Flowers
Brads
Popdots
Cut-out - cake
Pearls
Stickles
I decided to try something different this time and, instead of using white paper to print my Imagine image, I used blue striped paper. It’s been mentioned that we don’t always need to use white paper --- that we can use solid coloured paper, to get different effects. Well, using patterned coloured paper gets one a WHOLE different effect. :-) Check it out. Here’s a sample of the paper I used. Now see how neat the girl and the sentiment: “You Take the Cake” looks. Cool, eh? I think I’ll continue to experiment w/ different patterned paper in the Imagine. It’s gonna open up a whole new world. The possibilities are endless.

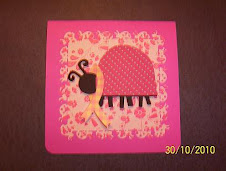
Anyway, let me get back to how I created this card. I used the “girl” on p. 21. I wasn’t too keen on the cake that she was holding, so replaced it w/ a cake cut-out that I already had. To achieve this, I just used the first layer for the girl. LOVE those layer features!!! The “You Take the Cake” sentiment is from p. 27. I actually tried out a couple of "insides". The "Make a Wish" is also on p. 27.
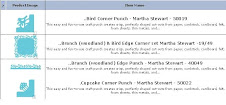
Then along came Mary. Ooops. I kinda got carried away w/ a song in my head. LOL I’m meaning Martha! Not Mary!! Martha Stewart and her fabulous punch sets. I used the Daisy fan deep edge punch for one side of the background layer. Then. . . . . . you ready for this??? I doubled-up on that punch and created a medallion border. I’m going to showcase all of my deep-edge punches in another post, later on. Here, you can sorta see what I mean:-
Then along came Mary. Ooops. I kinda got carried away w/ a song in my head. LOL I’m meaning Martha! Not Mary!! Martha Stewart and her fabulous punch sets. I used the Daisy fan deep edge punch for one side of the background layer. Then. . . . . . you ready for this??? I doubled-up on that punch and created a medallion border. I’m going to showcase all of my deep-edge punches in another post, later on. Here, you can sorta see what I mean:-

You punch the border once. Then, turn it around and punch again. You end up w/ this gorgeous medallion border. (see my card) How cool is that, eh? Well, to be perfectly honest, I didn’t come up w/ this on my own. I actually saw Martha, or her assistant, demo this on a YouTube video, w/ her latest punch sets that are only available on HSN right now. Soooo, if you’re in the USA, you can take advantage of this wonderful offer that’s only available for a short time. Us, Canucks, are very nicely discriminated against, to partake of any HSN goodies. :-(
Now that I’m done crying/whining, I’ll carry on w/ how I finished off my card. Used Stickles on the cake, pearls on the border punch and flowers/brads on the medallions.
Now that I’m done crying/whining, I’ll carry on w/ how I finished off my card. Used Stickles on the cake, pearls on the border punch and flowers/brads on the medallions.
Hope you all have a wonderful week-end!! :-)
Entered into:
K. Andrew's Simply Sunday Challenge at Getting Cricky