Thanks for stopping by
Thanks for stopping by. Hope you enjoy your stay!
I've noticed that I have visitors from all over the world. To make your stay more enjoyable, I have added a "translator" for you.
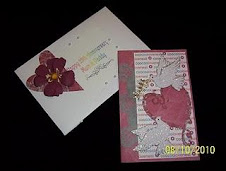
It’s our anniversary today ---- 33 years. Wow! It seems like only yesterday that I fell head-over-heels for the love of my life. Happy Anniversary, Sweetheart!
J
I made him this card:-

Inside:-

Close-up:-

Don't forget that you can click on the pix to enlarge them. :-)

Tools/Items:-
Cricut Imagine
Cricut Imagine Cartridges – see below
Cricut Cartridges – see below
Glue – regular; ATG; Zig Two Way; glue gun (for the rosette)
Cardstock – double-sided for the card base; white (for the Imagine)
Patterned Paper
Bead – Blue
Paper Rosette
Popdots
Cricut Imagine Cartridges
Enjoy the Seasons – male and female hearts, and layers
Better Together – You Make my Heart Sing; Heart and layers
Cricut Cartridges
Beyond Birthdays – Happy Anniversary
Lyrical Letters – Sweetheart
Made my very first paper “rosette”, as a flower on the patterned paper. The swirls resembled a stem, so plunked a rosette flower on top. J
I just love playing w/ my Imagine. I took the two sentiments from regular Cricut carts. and floodfilled them w/ a pattern from the Imagine cart, “Enjoy the Seasons”. All of the colours and patterns co-ordinate w/ the already-made designs, so it makes creating a card very easy-peasey.
The paper rosette was made using patterned paper. There are many tut’s on the Web, but here’s one that I really liked. It has very detailed instructions/pix.

Made this card for a family that’s going through a really rough spell.

Inside:-


Tools/Items:-
Cricut Imagine
Cricut Imagine Cartridges – see below
Cricut Cartridge – Lyrical Letters
Martha Stewart Punch – Monarch Butterflies Trim
Glue – regular; ATG; Zig Two Way
Cardstock – green; white (for the Imagine)
Popdots
Flower
Rhinestones
Corner punch
Cricut Imagine Cartridges
Best Friends – frame
Better Together – flower and butterfly, w/ layers
Created completely using the Cricut Imagine. Used the frame from the Best Friends cart., w/ a rectangle Stock Image and the green pattern from the Best Friends cart, which was placed behind the frame. The flower and butterfly were from the Better Together cart. Put rhinestones on the butterfly’s wing. Everything was popdotted in layers.
The sentiment on the front of the card was “Warm Thoughts” from the Lyrical Letters cart. Used the Color Cop and the RGB codes to find the shades of pink and green. (Pink for “Warm Thoughts” and the sentiment on the inside of the card; and green for “FLUTTER”). The flower is hand-made by a special Cricut friend I met, through winning her blog candy. You should really check out her blog:-
CRICUTROOKIE .
She has some amazing creations! :-)The butterfly border on the inside of the card was created w/ the MS Butterfly punch, rhinestoning various ones.
The font I used for "FLUTTER" is KR Butterfly.
The sentiment was computer-generated, using RGB codes.
Made this card for a dear friend --- just because! There’s a li’l story behind why it is "what it is":-my hubby would refer to my friend and I as “Tweedledee and Tweedledum”. Sometimes, he’d go one step further and call us “Tweedledum and Tweedledumber” and we’d always tease each other as to who was which one. :-)
When I got my Disney Classics cart, I knew exactly which design(s) I was going to use, first.

inside of card:

 Tools/Items:-
Cricut Imagine
Cricut
Tools/Items:-
Cricut Imagine
Cricut Cartridges – see below
Martha Stewart Punch Around the Page – Ribbon Loop
Glue – regular;
ATG;
Zig Two Way
Cardstock – purple; white (for the
Imagine)
Corner rounder – Corner Stone by
EK Success
Popdots
Rhinestones
Cricut Cartridges
Disney Classics – Tweedledee, Tweedledum, Cheshire Cat
Lyrical Letters – “You & Me”
This card was completely created on the
Cricut Imagine, flood-filling designs, using the regular
Cricut cartridges. I used the “
Color Cop” to obtain the RGB codes for the
Disney characters, via
Disney Clipart. What an awesome way of getting the exact colour that the character is supposed to be. No fumbling thru coloured cardstock to find the right shades --- the
Cricut Imagine does it all!
I found a background of Alice in Wonderland on the Net, using that as the backdrop for the “twins”.
Used the same background, for the inside of the card, only cut it down and used the MS punch around it.
Added rhinestones to the ties; then pop-dotted the “twins. The sentiment was computer-generated.
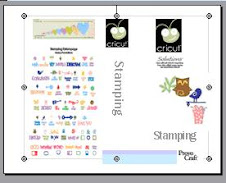
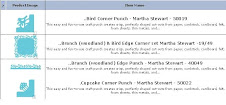
Tomorrow, I’ll showcase how I was able to “keep track” of all the teeny tiny design pieces.
It was my niece’s 25th birthday, so made her the following card:-

The birdhouse flips up to reveal the sentiment, “Happy BDay”. The other sentiments are computer-generated.

the inside of the card. . . . . .

the back of the card. . . . .
 RECIPE
Tools/Items:-
Cricut Expression
Cricut Design Studio
Cricut Cartridges (see below)
Glue (regular & Zig Two-Way for small items)
Patterned Paper
Cardstock – double-sided (see below)
MS punch – Woodland Branch (top of sentiments)
MS punch – Optic Dot (eaves of birdhouse)
Sizzix Sizzlits - Scribbles Swirls die (branches)
Stickles
Skittles
Brads
Flowers
Ink (for edging)
Corner rounder
Cricut Cartridges used:-
Cindy Loo – birdhouses and layers, heart for housetop
Lyrical Letters – Happy BDay sentiment
Stamping – bird, circle around hole
I just love my Cricut Design Studio. I needed it to skew the sentiment, “Happy BDay” so it would fit inside the birdhouse. You can achieve the same result using the Cricut Gypsy.
Here is the CostCo cardstock I used:-
MemoryStor® 300 Count Scrapbook Cardstock with Crop Case
75 Designer Patterns, 4 Sheets each

Because it’s double-sided, you can get a lot of different effects and it adds visual interest. I tried to make it so the front of the card would have a minimalist design on it, and was pleasantly surprised when the back had a full design, with the inside of the card, having a leaf design centered on the card. Couldn’t get anything better than that. Hope Shawna likes it!!


My very first tri-shutter card. I’ve always wanted to make one so, seeing as it was a special friend’s 50th birthday, I gave it a shot and had a ball making it.
Here’s the recipe:-
Tools/Items:-
Cricut Expression
Cricut Cartridges (see below)
Score Board
Glue (regular & Zig Two-Way for small items)
Patterned Paper
Envelope
Embellishments (see below)
Popdots
Cricut Cartridges used:-
Pink Journey – scalloped ovals & flourish
Lyrical Letters – Happy BDay
Hannah Montana - butterfly
Plantin Schoolbook – tri-shutter card, itself
Home Décor - flower
Various embellishments:-
Regular bead – on small blue flower
Seed beads – on border punch flowers
Flowers – interspersed on the card
Stickles – on small butterflies
Skittles – on light blue flowers
Pearls – on blue & brown flowers
Chipboard – 50; Happy Birthday; Celebrate
Ribbon – around scalloped oval
Rhinestones – on large butterfly
I used the cut file provided by OkieLadybug at:-
http://okieladybugsscrapnmore.blogspot.com/search/label/Tri-Shutter%20card%20PS
(thanks, Okie!) but, if you don’t have a Cricut Expression, you can make it manually by following Bonnie Szwalkiewicz’s instructions at:-
http://www.splitcoaststampers.com/resources/tutorials/trishuttercard/
(thanks, Bonnie!)
I used my Martha Stewart Scoring Board to score the various parts. Worked like a charm! :-)
I put the card together, using various coloured patterned paper, die cuts from the Cricut cartridges and different embellishments, pop-dotting the flower and butterflies. The sentiments are computer-generated. The tiny butterflies are from the Martha Stewart punch, using “Waterfall” Stickles to embellish. I used the Martha Stewart flower border punch, on the right-hand side, adding seed beads to them.
If you can’t see the sentiment clearly, it says:-
50 is just a number - It's where the heart is that counts.
Happy Birthday, my dear friend!
The envelope was a regular A2, covering it with the “negative” of a scalloped oval. Then I added, inbetween, “Happy BDay”. I think it turned out pretty good!! :-)
Now, if you haven’t already made one of these cards, give it a “go”. :-)




 Inside:-
 Close-up:-