owl

Background Image - Ladybug

Follow Me Frame

Follow Me Frame

More to see

More to see

Translation Button

Welcome ladybug

Welcome ladybug

Thanks for stopping by

Thanks for stopping by. Hope you enjoy your stay!

I've noticed that I have visitors from all over the world. To make your stay more enjoyable, I have added a "translator" for you.


Showing posts with label MS - Ribbon Loop. Show all posts

Monday, June 3, 2013

Angel Card

Made this card for a special MB friend who has endowed me w/ a lot of RAK’s.  She’s truly an "Angel on earth"; hence, the angel card.  J

Inside:- 

Tools/Items:-
Patterned Paper – card layer
Cardstock: white; glittered white
Martha Stewart Circle Edge Punch --- Doily Lace
Martha Stewart Punch Around the Page – Ribbon Loop
Glue – ATG; Zig Two-Way

Created the angel using the MS circle edge punch.  I found the instructions here:-


The sentiment was computer-generated. 

She really liked it!  J


Sunday, May 29, 2011

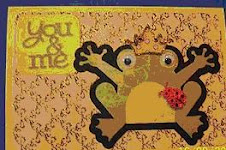
"Just Because" Card

Made this card for a dear friend --- just because! There’s a li’l story behind why it is "what it is":-my hubby would refer to my friend and I as “Tweedledee and Tweedledum”. Sometimes, he’d go one step further and call us “Tweedledum and Tweedledumber” and we’d always tease each other as to who was which one. :-)

When I got my Disney Classics cart, I knew exactly which design(s) I was going to use, first.


inside of card:


Tools/Items:-
Cricut Imagine
Cricut Cartridges – see below
Martha Stewart Punch Around the Page – Ribbon Loop
Glue – regular; ATG; Zig Two Way
Cardstock – purple; white (for the Imagine)
Corner rounder – Corner Stone by EK Success
Popdots
Rhinestones

Cricut Cartridges
Disney Classics – Tweedledee, Tweedledum, Cheshire Cat
Lyrical Letters – “You & Me”

This card was completely created on the Cricut Imagine, flood-filling designs, using the regular Cricut cartridges. I used the “Color Cop” to obtain the RGB codes for the Disney characters, via Disney Clipart. What an awesome way of getting the exact colour that the character is supposed to be. No fumbling thru coloured cardstock to find the right shades --- the Cricut Imagine does it all!
I found a background of Alice in Wonderland on the Net, using that as the backdrop for the “twins”.
Used the same background, for the inside of the card, only cut it down and used the MS punch around it.
Added rhinestones to the ties; then pop-dotted the “twins. The sentiment was computer-generated.
Tomorrow, I’ll showcase how I was able to “keep track” of all the teeny tiny design pieces.


Monday, December 13, 2010

Happy Birthday Daughter!

It's our daughter's 23rd birthday. Happy Birthday, Sweetie!! :-)

Made the following card for her. That gal sooooooo looks like our daughter (except she's a natural blonde, who decided to dye her hair). Go figure, eh?? I almost put blonde hair on the gal but caught myself, before doing so.


RECIPE:-

Tools/Items:-
Cricut Expression
Cricut Design Studio (for sizing --- not really needed)
Cricut Cartridges (see below)
Glue (ATG & Zig Two-Way for small items)
Patterned Paper
Cardstock
Martha Stewart border punches: Optic Dot; Ribbon Loop
Martha Stewart punch: Happy Birthday
flower
brad

Cricut Cartridges used:-
Heritage: - daughter
Rock Princess:- Jenn and Jenn-s, plus layers (p. 37)

The sentiment is computer-generated.

She thought her birthday had been combined w/ her Dad's, when he had his surprise BD party. But we surprised her, after her Godmother (GM) took her out for lunch --- w/ a cake and pressies. She told her GM that she thought "something might be up because Mom is crafty". I think she meant my being "sly" instead of being artsy/crafty.

FeedJit Live Traffic Feed

Thank you for visiting ladybug

Thank you for visiting ladybug

Birdie thank you

Birdie thank you