owl

Background Image - Ladybug

Follow Me Frame

Follow Me Frame

More to see

More to see

Translation Button

Welcome ladybug

Welcome ladybug

Thanks for stopping by

Thanks for stopping by. Hope you enjoy your stay!

I've noticed that I have visitors from all over the world. To make your stay more enjoyable, I have added a "translator" for you.


Showing posts with label MS - Modern Garland. Show all posts

Sunday, March 31, 2013

Hubby’s Easter Card


Made this card for my hubby for Easter.  He thought it was soooooo cute!  J


Inside:- 


It was actually inspired by Mary of Cardz TV.  She has some awesome vid’s.

I got to use, for the first time, my new MS Circle Edge punch.  I loooooove that li’l gadget.  Turns an ordinary square piece of paper, into a decorative circle.

Tools/Items:-
Cricut Imagine
Cricut Imagine Cartridges – see below
Cricut Cartridges – see below
Cardstock -- white (for the Imagine)
Cardstock – blue (for layers)
Patterned paper (circle and square)
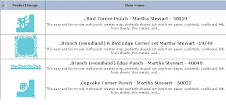
Martha Stewart Circle Edge Punch – Modern Lace
Martha Stewart Punch Around the Page – Modern Garland
Glue – ATG; Zig Two-Way
Stickles – Waterfall (sentiment)
White Pen – Gelly Roll (eyes, nose highlights)
Yellow felt pen – suns on font
Rhinestones
Popdots


Cricut Cartridges

Teddy Bear Parade – teddy bear and layers
Tags, Bags, Boxes & More 2 – sentiment

Cricut Imagine Cartridges

Audrey – Easter bunny costume; Easter basket; bows
Better Together – Happy Easter sentiment

Bear Face – RGB codes:  153, 76, 0

Hunny Bunny font – LD Happy Sun

NOTE:  I loved how, when I flood-filled the bunny costume w/ the pattern, that a heart appeared right in the middle of his li’l tummy.  I had no need to attach his actual tan tummy.  Thought it looked cute!  J


Wednesday, August 29, 2012

My "Cricut Angel"

Made this card for a very special MB friend, Anne, who I call my "Cricut Angel" because she gave me a Cricut cartridge, completely gratis.  How sweet was that, eh?  So, I made her this card and a desk plaque.  J


Inside:-


Desk Plaque 


Tools/Items:-
Cricut Expression 2
Cricut Cartridges: see below
Cardstock – white; green; black
Patterned Paper
Martha Stewart Punch Set – Modern Garland
Stickles – Diamond; and Gold
Glue – ATG; Zig Two-Way
Rhinestones
Pop Dots

Cricut Cartridges:
Cricut Decals (Expression 2 exclusive) – Cricut and layers
Just a Note (Expression 2 exclusive) – Thank You

Make a card base by folding an 8 ½” x 11” piece of cardstock, in half.

Using patterned paper (5” x 8”), punch corners and borders with the Martha Stewart Modern Garland punch set.

Cut the Cricut Angel, and layers, from p. 28 of the Cricut Decals built-in cartridge. (, Cricut Heads).  Stickle the wings and halo with Diamond Stickles.

Attach the Cricut Angel with pop dots.

Add computer-generated sentiments.

Inside of the card:
Cut a background from the patterned paper and punch out the corners using the Martha Stewart punch.
Cut a “Thank You” and layers from p. 37 of the Just a Note built-in cartridge. (Pinwheel, Phrase Layer)

Stickle the “a”, “o” and “u” layers with Gold Stickles.  Attach a rhinestone in the “o”.

I also created a desk plaque:-  Honorary Angel.

Honorary was computer-generated, using the CK Celebration font.
The angel wings image was clipart found on the Net.

Stickled the halo with Gold Stickles.  Attached a little star to it.

Heard back from Anne and she loved them both, which made me very happy.  J


FeedJit Live Traffic Feed

Thank you for visiting ladybug

Thank you for visiting ladybug

Birdie thank you

Birdie thank you