Welcome ladybug
Thanks for stopping by
I've noticed that I have visitors from all over the world. To make your stay more enjoyable, I have added a "translator" for you.
Sunday, February 12, 2012
Stampin' Up Wheel Storage
Saturday, February 4, 2012
Stickle Storage
Here's what the actual adapter looks like:-
Saturday, January 21, 2012
Faux Stampin' Up Wheel Guide
Here's what the "real deal" looks like:-
You get 2 in a package and they clip together to form a 24" strip. I would have no use for the 24" size. The other use of it is to clip it together to form a right angle, which is beneficial for creating mitered corners. Again, I see no use for that.
So, I created my own.
On it's side, measuring 3/8" depth.
Works like a charm!!!! I LOVE it!!! So, save yourself some money. The rulers were bought at the $ store for a buck each. $5.00 for your very own wheel/stitch guide.
If you make one, let me know. :-)
Monday, August 8, 2011
Labels breakdown
Hi there! Hope you all had a great beginning of the week! Hopefully, the rest of the week will be just as nice for you. :-)
Just wanted to let you know that I have now inserted a "break-down" under my "Labels" w/ Cricut Cartridges, etc.
Here's the legend:-
C - Cricut cartridges used in projects
CB - Cuttlebug folders used in projects
Saturday, June 4, 2011
Storage container – repurposed
Until now! :-)
I just recently bought a Sew Easy Stitcher starter kit. I’m one who likes to keep these li’l gadgets all contained in one place; otherwise, I’d lose them and never find them again. So, this kit has been sitting in its original packaging, awaiting a home. Then I spotted this poor, lonely container. Look at how all the pieces fit so nicely in there. It’s almost like it was “meant to be”.
I only have 4 heads for the Stitcher, so I have one in each compartment; however, the compartments will hold two heads. So this container can house 14 heads and one more Fancy Floss.
Here's the back of the storage unit, which holds the piercing mat and anything else you want to put into there.
The packaging that the single piercing heads came in --- had this on the back of the package. I peeled away at the cardboard(s) until I just had the top image(s). Cut them to size and ATG'd them to a piece of cardboard. Now, I have an "easy to see, at one glance" other ideas for the piercing heads.
I just love it when a plan comes together.
Monday, May 30, 2011
Faux Scrap'n Easel
As promised, I have something to show you that helped me tremendously w/ my last project, working w/ li’l design pieces. As we all know, these pieces can go astray at the drop of a hat. Some people work from their Cricut mat, while gluing the pieces together. I prefer not to have my mat exposed to the elements very long, so I remove my designs right away and then replace the cover on the mat.
I’ve been admiring the Scrap’n Easel for a lonnnnnng time. As I can’t justify the cost right now, I’ve been trying to win one from different blogs, w/out any luck. So I decided to create a "Faux Scrap’n Easel". Now, this one doesn’t completely mimic the famous Scrap’n Easel by no means:-
- It’s not an easel; J
- It’s not a fold-‘em-up item; J
- It’s not 12 “x 24”; J
- It doesn’t have set pockets on the corners; J
But it does have:-
- Magnetic surface (11” x 11”), which is the “biggie”; J
- Corners (which I made myself) that can be moved around on the board, for different sized paper;
- Ladybug magnets (that I made using magnetic buttons and felt ladybugs).
Only cost about $15.00. Board was $13.00. Magnets and ladybugs were $1.00 each/pkg.
Worked like a charm when I had all the li’l layers for Tweedledee, Tweedledum and the Cheshire Cat. J
Looking forward to using it for all my projects, now. Hope I’ve inspired some of you!
Thursday, May 19, 2011
Latest Cricut Cartridge Check List - May 2011
http://www.mediafire.com/?hzphmagi0hp95hd
Hope you enjoy!! :-)
Tuesday, April 12, 2011
Type Ruler
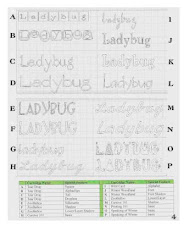
Have you ever wondered what size of font you needed for a certain project? Or what that size font would look like? Well, wonder no more. I found this awesome Type Ruler, created by Creating Keepsakes.
Here’s what it looks like:-
Click here for the download:-
http://www.creatingkeepsakes.com/content_downloads/COOL-RULE-2.pdf
Just print it out, and start journalling! Enjoy!
Thursday, March 17, 2011
Latest Cricut Cartridge CheckList
Hiya. ProvoCraft has released 6 new cartridges, for their Hello Thursday, this month. They are:-
Cricut® Damask Décor Cartridge
Cricut® Elegant Edges Cartridge
Cricut® Everyday Pop-Up Cards Cartridge
Cricut® Father's Day Seasonal Cartridge
Cricut® Happy Graduation Seasonal Cartridge
Cricut® Luau Seasonal Cartridge
I have updated my Cricut Cartridge CheckList and you can find it here:-
http://www.mediafire.com/?c1ucpcx3hzhcnnl
They also released a new cartridge for the Cricut Circle Club but, because I don’t belong to the Club and I have no information of what else was provided to the Circle Club, I haven’t added them to my list.
Friday, February 18, 2011
Updated Cricut Cartridge List
Hiya. Well, our good friend, ProvoCraft, released 3 new cartridges this month. They are:-
Creative Memories™ Stork's Delivery Cartridge
Cricut Imagine™ Colors and Patterns, Vintage Papers
Cricut Imagine™ Colors and Patterns, Heirloom
I have updated my Cricut Cartridge List and you can find it here:-
http://www.mediafire.com/?ocqufi1fxd1xcg5
I'd like to know if you're enjoying this list and it's meeting your needs. I realize that not everyone has the same needs and maybe this list isn't what you're looking for.
Would you like me to continue updating it and sharing it on my blog?
Thanks!
Wednesday, February 16, 2011
Search Feature explanation
Noooooo, you don't plunk in "special", Audrey --- you put some topic that you might be interested in seeing. e.g. Say, you remember me babbling about my revolving rack. Rather than scrolling thru the WHOLE blog searching for the diff. posts or even clicking on "craft room" under "Labels", all you need to do is type in "revolving rack" in the "Search feature" (as in the pic below), and it will bring up each and every post that my revolving rack appears.
How cool is that, eh??? Hope this helps a lot better! :-) You can click on the pic for it to enlarge!
Oooops, almost forgot to mention:- this super feature is available in Blogger, under "design". You add a gadget and it's called: Google Search.
Monday, February 14, 2011
Sewing room
I always refer to my "haven" as my "craft/sewing room". Well, I'm now going to showcase the "sewing" part of it. It just takes up one wall, whereby my craft section takes up 3 walls and the middle. :-)
You may have seen this pic before. It's the wall directly to the left, as you enter the room. It has a sewing cabinet against the wall. It's a "Horn" cabinet that the front flips out and over, to house a Serger. It has a 3-position air-lift mechanism for my sewing machine, which is awesome. More pix later.
Here's "Schweetheart" (a Ty baby that used to belong to my DD). He now guards my sewing section. :-) To the right, is my corner cabinet that houses my sewing fabric and notions.
You can also see (CLICK on the pix to enlarge them!) a Singer sewing machine that I got when I was a child. (I started early!) :-)
Here's a close-up of the wallhanging I made. It has pockets for various notions. It was a blast making it.
Here's the top of the sewing wall. Hubby put up my "sewing machine" spool rack yesterday. Yeah!!!! :-)
Here it is, fully stocked w/ embroidery and serger thread. A friend of mine designed the pattern for it and then her hubby jigsawed it out. Cute, eh??? I'm pondering painting it black and then jazzing it up w/ some embellies. But, still mulling that over.
Here's my sewing cabinet. Ohhhhh, what's that on the floor??? Did I drop something?? Nooooooo, it's just li'l Bailey. LOL Isn't he just the most adorable li'l thing, ever??? :-)
The right side flips up to give more area to work. Then the back flips up for a cutting area. I just LOVE that cabinet. Hubby totally surprised me w/ it one Christmas. DD had just moved out and her room was "up for grabs". Sooooo, I grabbed it. LOL First, had to remove wall paper, posters, you know the drill. LOL Hubby told me to stay out of the room, as he was going to clean the carpet, so I very willingly obliged. LOL Christmas came and we opened our presents. Then he told me there was one more pressie for me. He took me to DD's old room and, lo and behold, there was my new sewing cabinet, w/ a HUGE burgundy bow on it and w/ the Sewing Machine in it, along w/ the Serger. (it's housed in a pull-out drawer on the bottom left) What an absolute sweetheart, eh? :-) I think he's definitely a "keeper"!! :-)
Here's the cloth cover I made for it. It still needs to have the bottom completed. If you enlarge the pic, you can see that I used puff paint for the bottom of the sewing machine and other spots. All of the designs have been appliqued on the cover. That's mainly what I enjoy/love sewing ---- crafty thingies.
Here's the top of the cover, where I was playing around w/ some embroidery stitches.
I've never sewn a dress or any other outfit. I've mainly embroidered T-shirts, napkins and, not to forget, my wallhanging. I could previously only use my sewing machine on either the kitchen or dining room table for. . . .years, so it didn't really get much use. Now that I have my craft/sewing room, I'll be able to play w/ it a lot more.
I have the Customizer 2000 for it but have never played w/ it. Go figure, eh? LOL Can't rush into these things, you know. LOL Thank heavens they've done "upgrades" that one can download off the Net for it. :-) For those that don't know, the Customizer allows one to download clipart (or other embroidery designs) off the Net and then convert them into embroidery designs. They have since come out w/ machines that are totally computerized. I don't have a need to upgrade to one of those, as I'm very happy w/ the Janome 9000, that I have. :-)
Hope you enjoyed my li'l "sewing corner". Just goes to show you what you can fit into a teeney room.
I'm working on doing an updated "room lay-out", so you can readily see how my room is laid out. And. . . . . .one day soon, I'll tackle doing a video of my room. Have never done a video before, so it'll be quite the challenge but, at the same time, a lot of fun. Stay tuned. :-)
Sunday, February 13, 2011
Siggie Tutorial
Top o' the morn. to ya!!! I would love to show you how I accomplished my li'l siggie thingie. :-)
I got the instructions from this awesome blog:- Shabby Blogs
I tried posting the instructions directly into my blog but, for whatever reason, the coding wouldn't show up. So, here's
the direct link to where the instructions are:http://shabbyblogsblog.blogspot.com/2009/05/tutorial-how-to-add-custom-signature-to.html
Just wanted to mention one thing:- this isn't the "combo border/siggie" that a lot of people have. I have nooooooo idea how they got that. Mine went all garbally-gook on top of everything. That's when I found these instructions. This siggie shows up "ALL THE TIME" right in your POST area. Soooo, if that's what you're after, you're on your way. :-)
- - - - - - - - - - - - - - - - - - - - - - - - - - - - - - -
Now, isn't that the easiest-peasiest instructions, ever???!!!! I LOVE it! If I would've tried these, right off the bat, instead of spending HOURS (& I mean hours!!!) trying to do the other one, my stress level would've been a lot better. It was really nerve-wracking, as some of you already know.
It also drove me craaaaaazy doing the "border" thingie. And. . . . . I have NO idea how I finally ended up doing it. The coding that I was supposed to find in my HTML coding just WASN'T THERE. But I kept playing around w/ this and that, deleting this and that, adding this and that, and FINALLY I ended up w/ a repeating border. But, I couldn't repeat that task, if my life depended on it. Soooooo, I probably can never substitute another border for it, neither. :-(
But. . . . . I am more than happy w/ how this li'l siggie thingie worked. It was very easy-peasey! Let me know how yours turned out. I would love to see it!!! :-)
Oh, yeh --- they also have instructions on their site how to do those dang repeating borders. Hope you have more success than I did. :-)
http://shabbyblogsblog.blogspot.com/2009/06/tutorial-how-to-add-post-dividers-to.html
Saturday, February 12, 2011
My new craft work area
I'm very happy w/ the end result. As you can see, my revolving rack fits very nicely in its spot beside the desk. You'll see some vacant space to the left of the desk. That's so the corner cabinet door is able to open fully. I can still store some things on the floor beside the desk, as the door is only the top half of the corner cabinet. Maybe sweet li'l "Ann Estelle" (Mary Engelbreit doll) can perch there. You can see her backside in the pic below. :-)
Don't forget that you can enlarge the pix, by clicking on them. :-)
So, here's the computer station which is now going to be my "Card Creating Station". I can pull out the keyboard tray and use that as extra creating space. I'm using the CD holder area to store my "Nestabilities". (I only have 4 sets, which are stored in CD cases.) I'm also going to store some clear stamp sets that I've also got in CD cases.
I still have a shelf that needs to go into the left-hand bottom area but I haven't quite decided what I'm going to store in there yet. So that will have to wait.
And. . . . . here's my revolving rack in all of its glory. (LOL) I made a sign topper for it. I've also made/created a new WORD:- "paraphernali". I know it should have an "a" on the end, being "paraphernalia" but that doesn't rhyme w/ "miscellany". LOL

FeedJit Live Traffic Feed
Thank you for visiting ladybug
Birdie thank you