owl

Background Image - Ladybug

Follow Me Frame

Follow Me Frame

More to see

More to see

Translation Button

Welcome ladybug

Welcome ladybug

Thanks for stopping by

Thanks for stopping by. Hope you enjoy your stay!

I've noticed that I have visitors from all over the world. To make your stay more enjoyable, I have added a "translator" for you.


Showing posts with label Imagine. Show all posts

Sunday, November 24, 2013

Thanksgiving placard

Here’s a Thanksgiving placard I made.  Had a lot of fun w/ it.  J

 popdotted:-


Tools/Items:-
Cricut Imagine
Cricut Imagine Cartridges  – see below
Cricut Cartridges – see below
Chipboard
Cardstock – white (for the Imagine)
Glue – ATG; Zig Two-Way
Stickles – gold; diamond; lavender
Pop dots

Cricut Imagine Cartridges 

Best Friends – scene
Enjoy the Seasons – turkey
Hey Diddle Diddle – button word

Cricut Cartridges

Country Life – barn
Simply Charmed – happy thanksgiving signage
Wall Décor & More – fence & rooster


Even tho our Thanksgiving has come and gone, I wanted to participate in a challenge that my friendly neighbours, the US of A were hosting.  So, this is for you, neighbour!!!  J


Friday, November 8, 2013

Cricut Circle Challenge #9

1.       Create a card or a LO, stamp, as well as emboss.... but use only 3 colour cardstocks.....any three colours and include a dressform on it.  
Used my Cricut Imagine to create this card. The background colours (teal, gold, and gray) are from the Ancestry cart. The dressform is from the French Manor cart. The spool of thread is from the Happily Ever After cart. Added some yarn on the spool. The stitching on my background “quilt” is from a Daisy D runner. The sentiment was computer-generated and I used the RGB codes of the teal and gold colours on the Ancestry cart. to mimic the colours.

I printed/cut 4 scallop circles, floodfilled with different designs (2 were the same:- grey) and then cut them apart to make 4 pie shapes. Glued them together, to form one circle. Then added my faux stitching, to make it look like a quilt. 


Cricut Circle Challenge #7

1.      Create a Christmas Tradition themed layout. You must use a minimum of 2 Cricut cartridges & at least 1 cartridge must not be a Christmas/Winter cartridge. 

Here's my LO:-


Santa's sleigh -- Imagine Snow Angel (Christmas cart.) 
 
Reindeer -- Create a Critter (
non-Christmas cart.)  

Santa's Littlest Reindeer was created in CCR, using the Songbird (another 
non-Christmas) cart. and manipulated to sit willy nilly, and cut w/ my Cricut Mini. 
The b/g paper has raised glittered snowflakes all over it. 
 
Reindeers' heads only and sleigh are pop-dotted. 


The "littlest reindeer" is referring to non other than li'l Bailey!!! 


Cricut Circle Challenge #4

1.    Create a project for Christmas without using any green, red or pure white in the project. [Off whites like a beige can be used.]

Here's my interpretation of a non-Christmasy coloured card.  

Whoever is the recipient of this card and will probably ask: "a 
pink reindeer?????" ---- I'll tell them that "Susan made me do it!!!"  LOL


Cricut Circle Challenge #3

1.    Create a home decor project using chipboard and Cricut cut flowers. This can be anything, a picture frame, a photo box or maybe a fridge magnet!

I made this li’l 3D owl a while back, using the Noah's ABC's cart. but, for this challenge, I decided to add some flowers to her. The flowers are from the Sophie cart.


Cricut Circle Challenge #2

1.     Create a fall banner. This could appear on the wall, card, scrapbook page or anything else you can dream up. One rule...it has to be fall themed. 

Here's my Fall "Giving Thanks" banner.  I used the following carts:-

Cornucopia --- Autumn Celebrations
Giving --- Create a Critter 2
Letters --- Imagine Country Carnival


Monday, September 16, 2013

Anniversary Card

It’s my hubby’s and my anniversary today.  This is the card I made him:

Upper inside:- 
Inside: 


Completely utilized the Cricut Imagine machine to create this card. 

Tools/Items:-
Cricut Imagine
Cricut Imagine Cartridges  – see below
Cricut Cartridges – see below
Cardstock – white (for the Imagine)
Patterned paper – layer on card
Cardstock – base of card
Glue – ATG; Zig Two-Way
Rhinestones/gems
Pop dots

Cricut Imagine Cartridges 

All Wrapped Up – “With all my Heart” sentiment; fill for other items
Better Together – tree, branch, owl, heart thought bubbles
Enjoy the Seasons – hearts (on tree)
Imagine More Cards -- owl

Cricut Cartridges

Something to Remember – “Anniversary/Vine” sentiment
Tags, Bags, Boxes & More 2 – “I Love You” sentiment
Tie the Knot – 35 w/ swirls


He loved it!!!  And, that’s all that matters to me!!  J


Sunday, July 28, 2013

Male 60th Birthday Card

Made this card for a dear male friend’s 60th birthday. J

Started w/ a card base using the Cupcake from the Cricut cartridge, Something to Celebrate.  Made it into a shaped card and made it as girly girly as I could.  LOL

I was being a li’l discreet about his age, in having the “60” in small numbers, next to the heart.  Looking at it, he prob. thought I mistakenly made this for someone else --- a girl!!! LOL

Then when he opens it up, I get down to the nitty gritty.  LOL  ---- him being over the hill and a buzzard.  LOL  


I’m sure he’ll get a huge kick out of it.  J

Tools/Items:-
Cricut Imagine
Cricut Imagine Cartridges  – see below
Cricut Cartridges – see below
Cardstock – white (for the Imagine)
Patterned paper (Over the Hill background)
Glue – ATG; Zig Two-Way
Stickles – Yellow (candle wicks)
Stamp -- swirls
Googly eyes
Flower sticker
Pop dots

Cricut Imagine Cartridges 
Best Friends – background & branch
Blossom – cupcake and layers

Cricut Cartridges
Life’s a Party – buzzard & layers; Over the Hill & candles
Something to Celebrate – cupcake & layers

Sentiments were computer-generated.


Monday, June 17, 2013

New Jammies

Seeeeee, I haven't forgotten my li'l Cricuts.  Here's some new jammies I just got for my Cricut Mini.


Isn't it just the cutest ever??  I just looooooove the li'l Bughead on it!!! J

Here she is, sitting on top my Cricut Imagine:- 

Don't they both just look so nice and toasty warm?!  J


Sunday, May 12, 2013

Mother's Day Card

Made this card for my mother for Mother’s Day.  

Inside: 


Tools/Items:-
Cricut Imagine
Cricut Imagine Cartridge – All Wrapped Up
Cricut Cartridge – Tags, Bags, Boxes & More 2 (sentiment)
Cardstock -- white (for the Imagine)
Glue – ATG; Zig Two-Way
Ribbon
Rhinestones
Buttons
Flowers


This Imagine cartridge already had a shaped card so I didn’t have to create one myself.  J


Thursday, February 14, 2013

Hubby’s Valentine Card


Firstly, yes there are male ladybugs; hence, this cute li’l “love bug” valentine for my hubby!  He’s my “love bug” of 35 yrs.  J

Created a shape card by putting two hearts together and attaching at the top.  Easy peasy!!  This was a fun card to put together, because of the fun shapes.

 Inside:-
Envelope front:- 
Envelope back:-

 
Tools/Items:-
Cricut Imagine
Cricut Cartridges – see below
Cardstock -- white (for the Imagine)
Glue – ATG; Zig Two-Way
Rhinestones
Pop Dots

Cricut Cartridges:-
Wild Card – envelope; heart w/ holes; cascading hearts; “Be My Valentine” sentiment
Love Struck – base card w/ heart layers
Create a Critter – ladybug & layers; “Love bug” sentiment

He absolutely loved his card and that's what made it extra special to me. J


Tuesday, February 12, 2013

Cricut Circle Member


I now belong to the Cricut Circle Club.   WhoooHoooo!   I never thought in a gazillion years that I would become a member because it was very costly when it first began.  But now Provocraft made it that you can use your Cricut Reward points (3000) to become a member.   If you’re unfamiliar w/ how the club works:-

This yearly membership includes:
  • Cartridge of your choice offered for membership
  • 10% off of all purchases made on Cricut.com
  • Free shipping on orders over $50 made on Cricut.com
  • Exclusive promotions on Cricut.com
  • Double reward points for purchases on Cricut.com
In anticipation of becoming a member, I made my very own Cricut Circle emblem/thingie.

How this all started was I was soooo excited about becoming a Circle Member that I literally drove my hubby nuts by me chanting:-  “I’m a Circle Member.  I’m a Circle Member”.  He retorted w/:-  "I’m going to call you 'Loopy' from now on."   J
Hence, me getting a “Circle/Loop” to make into an Circle emblem/thingie.

I started w/ an unfinished plant stake that had a chalkboard in the circle part.  I painted it Cricut green.  Actually the real color is "Apple Orchard" from Plaid.  I looked up the color on the Net to get the RGB codes for it.  Then I utilized my Cricut Imagine for the RGB codes and flood-filled the Cricut circle rim w/ the color.  It was a bang-on match!!!  I cut the shape out numerous times to make it sturdier and even flipped the image so the back of the circle-rimmed shape was green, too.  Very pleased how it all turned out.  J


Attached a blinged-up crown on her head, added gems around the face perimeter, and a bow for the final touch.  The gems mimic the colored polka dots in the bow.  Wrote “Circle Member” w/ chalk on the board.  


Here she is in all of her glory:-


I think she’s looks pretty divine, eh?   Now, I don’t have to keep chanting that I’m a Circle Member.  I can just look at my Circle Club emblem/thingie and I know that I am.  LOL

Tools/Items:-
Cricut Imagine
Cricut Cartridges – see below 
Cardstock -- white (for the Imagine)
Glue – Aleene’s All Purpose Tacky
Ribbon – pink/green/blue/purple polka-dotted
Rhinestones (various shapes/colors)
Pink chalk

Cricut Cartridges:-
Cricut Everyday (Cricut head)
Life’s a Party (crown)


Wednesday, January 9, 2013

Thank You card for Hubby


Made this card for my sweet hubby, who gave me an amazing Christmas.

Inside:-

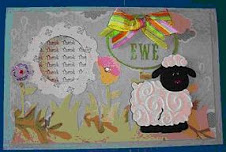
Used the Imagine More Cards cartridge for the li’l cow and sentiment. Used Elegant Edges for the frame around the sentiment and the lacy background.

Everyone knows that cows are glittered so just had to Stickle ‘em.  LOL  Added rhinestones for some bling.

The inside sentiment was computer-generated.  The background was created using the Martha Stewart Punch Around the Page.

Tools/Items:-
Cricut Imagine
Cricut Imagine Cartridge – Imagine More Cards
Cricut Cartridge – Elegant Edges
Cardstock -- white (for the Imagine)
Martha Stewart Punch Around the Page:-  Bubble Bath
Glue – ATG; Zig Two-Way
Stickles – Cinnamon
Rhinestones
Pop Dots


Thursday, December 13, 2012

Daughter’s 25th Birthday Card


My daughter isn’t into traditional BD cards, so I made her this one and she just loved it. J

 Inside:-

Tools/Items:-

Cricut Imagine
Cricut Imagine Cartridge – JT (designs)
Cricut Imagine Cartridge – Yummy (background design)
Cardstock -- white (for the Imagine)
Glue – ATG; Zig Two-Way
Rhinestones
Ribbon
Popdots


This is one of the largest cards I’ve ever made.  It’s
7 ½” x 8 ½” (folded) because I wanted the design to be readily seen, not eensey weensey.  I put the card base together w/ ribbon.  Clever, eh?  

The background paper is from the Yummy cartridge.  I call it “pink elegant”.  I used one of the stock images, found on the Imagine, cut at 7.4” and flood-filled w/ the pattern.

Created the various design(s) and layers, using the JT cartridge:-

* Frame:- Image 39, at 5”
* Wings:- Image 09, at 2.5”
* Skull:-   Image 08, at 2.2”

* Chillaxin’:- Image 49, at 2.6” --- added the layer of the skull (on the front page) to Chillaxin’.

Finished it off w/ rhinestones at the bottom of the frame and for dotting the “i’s”.

The sentiment was computer-generated.


Sunday, December 2, 2012

Shaped Christmas Card


I got started on my Christmas cards early this year. Can't believe it myself.  :-)

Anyway, wanted to share w/ you my shaped card, created on the Imagine. 

Firstly, I got my inspiration from cards shared that had been created using either the Gypsy or CCR but I wanted to strictly use the Imagine.

As you know, the Imagine designs don't have the "silhouette" cut that allows you to make a shaped card. I really wanted to utilize the "
Nutcracker" from the Santa's Village cartridge, so I put on my thinking cap (not easy to find usually) as to how I was going to accomplish this, and came up w/ the idea of "flipping" the image; hence, ending up w/ basically a "silhouette" of the front (orig. design) of the card, only flipped backwards. 

Using this technique, the possibilities are ENDLESS, using any and all images from Imagine cartridges!!!  

Because it's a "Nutcracker", I thought it looked cute having a back/front showing its design. If you didn't want this, all you need to do is print another front image and glue it backwards to the back. KWIM? Or is that clear as mud??  This way, you'd have a white inside, along w/ a white back and just the front would have the image.  
Here’s the front of the card, along w/ a computer-generated sentiment. Used Word Art and Clip Art. 


 Here’s the reverse of the design:-

Here’s the inside of the card, where I'll be putting my sentiment:-

Here’s the finished card:-

Pop-dotted:-


Tools/Items:-
Cricut Imagine
Cricut Imagine Cartridge – Santa's Village
Cardstock -- white (for the Imagine)
Glue – ATG; Zig Two-Way
Stickles -- Crystal
Rhinestones
Popdots

Sentiment was computer-generated.


FeedJit Live Traffic Feed

Thank you for visiting ladybug

Thank you for visiting ladybug

Birdie thank you

Birdie thank you