owl

Background Image - Ladybug

Follow Me Frame

Follow Me Frame

More to see

More to see

Translation Button

Welcome ladybug

Welcome ladybug

Thanks for stopping by

Thanks for stopping by. Hope you enjoy your stay!

I've noticed that I have visitors from all over the world. To make your stay more enjoyable, I have added a "translator" for you.


Showing posts with label C - Wild Card. Show all posts

Thursday, February 14, 2013

Hubby’s Valentine Card


Firstly, yes there are male ladybugs; hence, this cute li’l “love bug” valentine for my hubby!  He’s my “love bug” of 35 yrs.  J

Created a shape card by putting two hearts together and attaching at the top.  Easy peasy!!  This was a fun card to put together, because of the fun shapes.

 Inside:-
Envelope front:- 
Envelope back:-

 
Tools/Items:-
Cricut Imagine
Cricut Cartridges – see below
Cardstock -- white (for the Imagine)
Glue – ATG; Zig Two-Way
Rhinestones
Pop Dots

Cricut Cartridges:-
Wild Card – envelope; heart w/ holes; cascading hearts; “Be My Valentine” sentiment
Love Struck – base card w/ heart layers
Create a Critter – ladybug & layers; “Love bug” sentiment

He absolutely loved his card and that's what made it extra special to me. J


Tuesday, August 21, 2012


Made this Sympathy card for a dear MB member, who just recently lost her daughter.  No parent should have to say goodbye to their child. 


Tools/Items:-
Cricut Imagine
Cricut Cartridges: see below
Cardstock -- white (for the Imagine); patterned (for layers)
Martha Stewart Border Punch:-  Loopy Loop
Glue – ATG; regular
Seed Bead (eye of dove)

Cricut Cartridges:
Inspired Heart – Dove and layer
Wild Card – With Sympathy

The inside of the card was computer-generated.


Wednesday, May 4, 2011

Get Well card --- band-aid

My dear sweet hubby just had surgery, so I haven’t been doin’ much bloggin’. However, I wanted to share a card I made for him.
Firstly, I got him a Pooh Bear balloon (as he’s my “Pooh Bear”), which is holding a “Get Well Soon” balloon. The get well balloon has band-aids all over it, so it was very apropos for me to make him the “Band-aid” card, from the Wild Card Cricut cartridge. He loved everything.

I used my Cricut Imagine for the whole card. Man, was that ever neat --- first not having to search for the right paper and then adding the different patterns/colours to the mat.
I chose the patterns/colours from the Imagine More cartridge. So happy that was the one that came w/ my machine. :-) Here’s the card:-
Inside:-

  1. Cricut Imagine Cartridge – Imagine More
  2. Cricut Cartridges – see below
  3. Cuttlebug folder – Swiss Dots
  4. Glue – regular; ATG
  5. Cardstock - white
  6. Corner rounder – Corner Stone by EK Success
  7. Cricut Cartridges:
  8. Wild Card – band-aid, Rx, gauze
  9. Paper Lace – Get Well Soon sentiment – Lace 1


The band-aid card is on p. 65 of the Wild Card handbook. I used the following:-
  1. Band-aid
  2. Liner – for the gauze part --- cuttlebugged w/ the Swiss Dots folder
  3. Icon – for the RX (twice)
Because I had previously made colour swatches from each Imagine cartridge, it was really easy to choose the patterns and colours I wanted. I chose the Imagine More cart, for its vibrant colours.
I used the sentiment from the Paper Lace cartridge. I just love how one can use the older Cricut carts. in the Imagine, floodfilling patterns/colours, to one’s heart’s content. I used the corner rounder on it.
Here’s what a couple of my swatches look like.

The arrow is pointing to the patterned and solid coloured designs I chose. I think it just screams “band-aid”. Don’t you agree? :-)


Tuesday, November 23, 2010

Project Gone Awry

Have you ever had a project take a “wrong turn”?? Well, that happened to me, today, and thought I would share w/ you, how I managed to salvage it.

I wanted to make the “Cupcake Card” from the Cricut Wild Card cartridge. However, I wasn’t that excited about the actual cupcake on the card, so decided to utilize my Cricut Design Studio and change it up a bit.

The size of the cupcake was too small for my liking and it didn’t have much “punch” to it, so I designed a topper and wrapper in Cricut Design Studio, using the Home Décor cartridge that has a much cuter cupcake. I skewed the top and bottom, which turned out to be a lot larger than the original cupcake. I still liked the look of it. Wasn’t that happy, also, w/ the candle, so used the candle from the Celebrations cartridge, as it had a “heart” candle.

Also placed a li’l piece of red paper behind the heart, so it was showing up “red”. (see bottom pic) Cute, huh?? :-)

I first cut out the envelope, as you’re advised to do w/ the Wild Card cartridge. Can you see where this is going??? Yeppers, seeing as I enlarged the cupcake, it now wasn’t going to fit into the envelope. Ooops! Now what? Well, I had a brown envelope that was 6.5” x 9”, so chopped off a bit at the bottom, resealed it using my ATG and then wrapped the Wild Card envelope around the bottom of it.

Added a “Happy Birthday” (HB) sentiment, using the Martha Stewart HB punch. Didn’t end up looking too bad, if I did say so myself. LOL

Here you can see how the Cupcake Card will NOT fit into that teeny envelope. :-(

Front of new envelope, where I added the Wild Card envelope. . . .

Back of envelope. . . . .


Now, my chunky cupcake snugly fits into the envelope.


Tools/Items:-
Cricut Expression
Cricut Design Studio
Cricut Cartridges (see below)
Martha Stewart punch – Happy Birthday
Martha Stewart Score Board
Glue – regular; ATG
Cardstock
Patterned Paper

Cricut Cartridges used:-
Wild Card – Cupcake card and envelope
Home Décor – top and wrapper of cupcake; shadows of same
Celebrations – heart candle

Just goes to saying:- when life gives you lemons, make……lemonade ORRRRR another envelope! :-)

I've attached the Design Studio cut file, for anyone who would like it. I'll also place it in my "Free Files" section.


Cupcake Card cut file:-

Wednesday, October 13, 2010

MIL Halloween Birthday Card

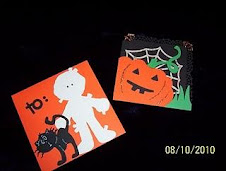
Made the following card for my Mother-in-Law (MIL), whose birthday is on Halloween.


Inside:-


Because the Wild Card cart, whilst utilizing the envelope, would cut out the card base at 3 ¾” x 3 ¾”, I decided to cut the card base out separately, at 5” x 10”; hence, making my own envelope using the MS envelope maker. Once I figured out the mathematical challenge, it worked like a charm. (see instructions below)

Also, because this card is for my MIL, I put a “mummy” on the front of the envelope. I think she’ll get a kick out of it!! Get it?? To: Mummy!! LOL

Mainly used the Wild Card cart for the card base, w/ the exception of adding the MS spider web punch around the sides. Wasn’t too keen on the spider that was on this cart, so used the cute li’l spider from the Paper Doll cart. The mummy needed a friend, so added the li’l cat from the Paper Doll cart. You could use a “to:” from a lot of different carts, but I chose the one from the Christmas Cheer cart.

Added Copper Stickles to the pumpkin to give it some definition. Added a pop dot to the spider on the web to give it dimension. Added Copper Stickles to the spider web to jazz it up a bit.

Computer-generated the sentiment and inserted it into a tag frame, using the Tag Maker.

The envelope was a li’l bit tricky, as I had to figure out the dimensions for cutting and scoring on the MS Score Board, using the envelope maker. I wanted an envelope to fit my 5” card, so had to create one that was 5 ½”.

Here are the dimensions/instructions I came up with:-

* Cut your cardstock to 9" x 9"
* Using the MS Score envelope template, score ALL sides at 3 5/8”
* Fold all the sides, then snip the li’l triangles
* Glue sides together, flipping up bottom and glue to sides, leaving top open

I then added a li’l liner.

RECIPE:-

Tools/Items:-
Cricut Expression
Cricut Design Studio
Cricut Cartridges (see below)
Martha Stewart Round the Page punch – Spider Web
Martha Stewart Score Board Envelope Maker
Glue (regular, Glue Glider Pro & Zig Two-Way for small items)
TagMaker and tag
Cardstock
Stickles – Copper
Popdots
Sentiment – computer-generated

Cricut Cartridges used:-
Wild Card – card base; pumpkin and stem; web; bat & spider (opt.)
Paper Doll Dress Up – cat & mummy (for envelope); spider
Pooh & Friends (opt.) – moon
Christmas Cheer – to:

Had a lot of fun making this card. Hope I gave you some inspiration to make your own. I’d love to see it, if you do.

I’ve included the cut file, for those who would like it.

http://www.mediafire.com/?5qccnz3xclu5j0j

Friday, October 8, 2010

"Hang in There" card

Made this card for someone who was going thru a rough patch. . . . .

inside:-


RECIPE:-

Tools/Items:-
Cricut Expression
Cricut Cartridges (see below)
Glue (regular, and ATG)
Cardstock
Patterned Paper
Googly eyes
pop dots (leaf & monkey)

Cricut Cartridges used:-
Sweethearts – monkey, leaves
Wild Card – sentiment (Hang in There)

Again, I have nooooooo idea why this picture is showing brown leaves. They really are “green”, including the inside of the card, along w/ its leaf. Verrrrrrry strange!! :-)

The patterned polka dot paper ended up having a dot between his li'l eyes. Almost looks like he's cross-eyed. (tee-hee)

Friday, August 27, 2010

Owl Birthday card

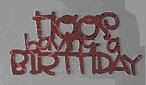
I absolutely LOVE the Cricut "Wild Card" cart. and had to give the li’l owl card a go. Because I don’t have the "Hoot ‘n’ Holler" cart. that has the saying “Hoos having a birthday”, I made my own, using Design Studio and utilizing the “All Mixed Up” cart. I’m sharing the cut file, if anyone is interested.
Inside:-
Front of envie:-


RECIPE:-

Tools/Items:-
Cricut Expression
Cricut Design Studio
Cricut Cartridges (see below)
Glue (Glue Glider Pro)
Patterned Paper
Cardstock
Ribbon


Cricut Cartridges used:-

Wild Card – owl base and envelope
All Mixed Up – fonts

The owl project is on p. 72 of the "Wild Card" handbook. There are many ways of putting this card together, but I chose:-

Envelope – “Owl-s”
Envelope layers – “Icon”, reg. and shift
Owl card – “owl”
Owl layers – “liner”, reg.
Envelope front – “frame”, shift

Here’s the cut file for the sentiment.

http://www.mediafire.com/?6s66qomoaq6wasz

Friday, August 13, 2010

Surprise card for hubby

Hubby is out of town and he has nooooo idea that this card is waiting for him on my blog. He's going to be checking it --- to show someone something.
(tee-hee)

Here you are, Sweetheart:-


If you click on each image, you will see greater detail.


RECIPE:-

Tools/Items:-
Cricut Expression
Cricut Cartridges (see below)
Sizzix – Garden Delight (for the “u”)
Quickutz – for the chocolate kiss
Glue (regular & Zig Two-Way for small items)
Patterned PaperCardstock

Cricut Cartridges used:-
Storybook – for the “I”
Cindy Loo – “miss”
Pink Journey – scalloped oval
Sweethearts – heart w/ couple silhouette
Hannah Montana – musical notes
Wild Card – “You make my heart sing”

Hope you like it, Sweetie!!! Can't wait until you come home. Bailey has been missing you, too!

Gift for a friend....

This is what I started with…..
This is how I embellished it…..

You can see more detail, by clicking on the images.

RECIPE:

Tools/Items:-
Cricut Expression
Cricut Design Studio – to check sizes of images
Cricut Cartridges (see below)
Glue (regular, Tacky, & Zig Two-Way for small items)
Patterned Paper
Cardstock
Flowers
Pearls
Tweezers (my new-found friend) :-)

Cricut Cartridges used:-
Pagoda – bridge fence; branches; Kanji symbols; Koi fish; Heron
Tie the Knot – smaller branches
Wild Card – sentiment on back

When I saw this li’l Geisha, I just had to get it for one of my friends. It sat around for some time, not knowing quite what to do w/ it. Then I got the Pagoda cartridge and everything finally fell into place. :-)

Everything was pretty much utilizing my Cricut cartridges, with the exception of the pool of water. I chose some patterned paper, that resembled trickling water, and just cut it to fit.

The two Kanji letters symbolize happiness and friendship.

I posted about these flowers before, so now you can see what I used them for. I added li’l pearls, using my “new-found friend”, the tweezers. Got them at the $ store and have no idea how I did w/out them, all these years. Made inserting the li’l pearls a true gem.
I put the “handmade just for you” sentiment on the back. Hope Aileen likes it!! I had a ball making it!

FeedJit Live Traffic Feed

Thank you for visiting ladybug

Thank you for visiting ladybug

Birdie thank you

Birdie thank you