owl

Background Image - Ladybug

Follow Me Frame

Follow Me Frame

More to see

More to see

Translation Button

Welcome ladybug

Welcome ladybug

Thanks for stopping by

Thanks for stopping by. Hope you enjoy your stay!

I've noticed that I have visitors from all over the world. To make your stay more enjoyable, I have added a "translator" for you.


Showing posts with label CB - Snowflakes. Show all posts

Sunday, July 17, 2011

Christmas in July

Well, I finally did it! I actually made a Christmas card before Christmas ---- and in July, yet! LOLInside:-


I absolutely fell in love w/ the Cricut Lite Jolly Holidays cart. But, when it first showed its face here, I missed out on getting it. :-( Then, just recently, a gal from the Cricut MB didn't want hers anymore and was willing to sell it to me. So, it was only apropos that I used it for my "first" Christmas card. :-)

Isn't the Santa and the li'l crow just an absolute hoot??!! :-)


Tools/Items:-
Cricut Imagine
Cricut Cartridge – Cricut Lite Jolly Holidays
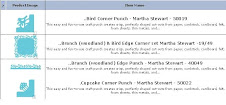
Martha Stewart Punches – Snowflake corner punch; snowflake single punches
Cuttlebug Folders – Divine Swirls; Snowflakes
Stamps – Stampin’ Up "Alphabet Soup"; Hero Arts – inside sentiment
Glue – regular;
ATG; Zig Two Way
Cardstock –
white (base); red; blue glittered; white (for the Imagine, snow and sentiment bases)
Stickles – Frosted Lace
Popdots
I was considering Cuttlebugging Santa’s beard w/ the Divine Swirls folder but I thought it might conflict w/ the snow and/or be too much. The sky is Cuttlebugged w/ the Snowflakes folder. Then I punched out individual snowflakes from the MS punches and pop-dotted them. I thought they complemented the Snowflake folder. :-)
Stickled both Santa’s and the li’l crow’s hat.
I’m still in shock that I’ve actually accomplished making a Christmas card in July. LOL That is definitely going to go down in history! :-)


Monday, November 22, 2010

Punch All Over the Page Aperture Card

Greetings everyone. This card was inspired by our latest beautiful weather. We got snow!!! :-)

Do you 'member a while back when I used the Martha Stewart Circle Cutter to cut various sized circles and then used the Swirling Lace corner punch all around it? See below.

Well, I thought how about using the Punch All Over the Page (PAOTP) on one of those circles. So, I chose the 3" circle, and used the Rose Window PAOTP.

Can you see a li'l white semi-circle shape in the bottom of the PAOTP circle? TBA later. :-)


The card base is 5" x 10", folded. The top layer is 4.75" square. Used the Snow Flakes Cuttlebug folder. Used the PAOTP through both the cardstock and patterned paper on top. Didn't place exactly in the centre -- a little more to the top of the card. Attached the PAOTP 3" circle.

Well, let's see what that li'l semi-circle shape might be:-
It's a li'l snowman peeking through! :-)

Used the Snowflakes Cuttlebug folder on the inside of the card, and then utilized the plastic that houses a Cricut cartridge, for the "window" effect.

Used the DecoArt Snow Writer on the white ripped paper. See how it sparkles? There are various Snow Writers --- one that's just plain white and this one, which glistens.

Pop-dotted the snowman on top and added a computer-generated sentiment.

RECIPE

Tools/Items:-
Glue (regular & ATG)
Patterned Paper
Cardstock
MS Punch All Over the Page – Rose Window (centre of card and circle)
MS Corner Punch – Swirling Lace (around the circle)
Cuttlebug folder – Snowflakes
DecoArt Glistening Snow Writer – snow
Cricut cartridge packaging – window
Pop dots – snowman
Sentiment – computer generated

Love how I can now make "aperture" cards --- anywhere on the page, thanks to the MS Punch All Over the Page punches!!

FeedJit Live Traffic Feed

Thank you for visiting ladybug

Thank you for visiting ladybug

Birdie thank you

Birdie thank you