Li'l Bailey is 5 years old today. Here he is in his "birthday suit". Errrrr, I mean his birthday outfit. (tee-hee)
Looks like he's saying:- "Can you hurry up and take the picture, already, so we can go for our walk and I can show off my new jacket??" J
Isn't he just the cutest ever??!!! Well, "I" think so. J
The patch reads:- "Commanding Officer --- Gooby K9 Patrol". On the other side is a patch of 3 stripes for "Sargeant". Bailey certainly is our Commanding Officer. LOL
Welcome ladybug
Thanks for stopping by
Thanks for stopping by. Hope you enjoy your stay!
I've noticed that I have visitors from all over the world. To make your stay more enjoyable, I have added a "translator" for you.
Wednesday, October 24, 2012
Saturday, October 13, 2012
Wednesday, September 26, 2012
Inkadinkado Stamping Gear
When I purchased my new toy, the Inkadinkado
Stamping Gear, I had a bittersweet moment.
Sweet because it’s an awesome fun
tool. Bitter because you can’t store the
items in the packaging it came in.
So I thought I would share, w/
you, how I store my new toy(s). J
Firstly, I bought the Deluxe set,
w/ a 50% off coupon. (Hooray for those!)
I have the wheels, cogs, and stamping
paddle stored in a plastic shoe box.
The stamps, themselves, are
stored in plastic pockets from a Cropper Hopper Photo Case --- two to a
package, to save on space.
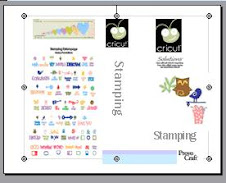
I printed off pix of the various
stamp sets and inserted them into the pockets, along w/ the stamp sets.
Deluxe Set:-
Elegant Flourishes & Branches:-
I’ve taken different shots of the
storage box, showing how many stamp pockets can fit inside. I just have two extra sets, along w/ the four
sets that came w/ the Deluxe set. I plan
on getting more, as they are just toooooo cute.
The designs they create are simply beautiful. Soooo many variations.
I also printed off pix of the
various designs that the various stamp sets can create. I like having a “visual” when coming up w/ ideas.
Would love to see what you create, if you have this fun tool. J
Monday, September 17, 2012
Storage for Cricut Machines
Just wanted to share what I’m
using to store my Cricut machines. It’s
actually a shoe rack. My room is very
teeny weeny, so I need to utilize all the space and storage ideas that I can. J
The lower shelf of the shoe rack has been placed upside down, so it has a base for one of the Cricut machines (AE2) to sit on. This rack fits on top of a li’l desk and hangs over the sides.
Hubby thought of the idea of attaching C-clamps, to keep the rack steady on the desk, so it doesn’t slide around, which it had been doin’ prior to the C-clamps. (they’re the red thingies)
The actual shoe rack. (from COSTCO for $19.00) I'm not using the middle shelf, so there's room to manoeuvre around the AE2.
The top shelf will be for my Expression. My Imagine is on its own cart, beside this li’l desk.
Another storage idea you can see in the pic, underneath the other desk, is the wire shelf unit that hubby made for me, from the left-overs of the wire cube thingies that he made my paper rack from. J This li’l rack houses my Iris containers of paper stacks. Works like a charm!
My paper rack, made w/ the wire cube thingies.
Hope I gave you some ideas that
you might be able to use for your storage. J
Sunday, September 16, 2012
Hubby's Anniversary Card
It’s our 34th
Anniversary today. Seems like just
yesterday, when we said our “I Do’s”. J
Here’s the card I made for my
sweet hubster:-
Tools/Items:-
Cricut Imagine
Cricut Imagine Cartridge – Lori’s Garden
Cardstock -- white (for the Imagine)
Glue – ATG
Corner Punch
EK Punch – Real Estate
K&Company -- Glitter stickers
Pop Dots
Love the Imagine Lori’s Garden cartridge. It has so many pretty designs on it so I knew
I just had to use it for my Anniversary card.
Utilized the stock images on the Cricut Imagine,
using the rounded square. Cut it at 5”
and floodfilled it w/ a solid green colour.
The patterned layer is the green floral found on p. 37 of the handbook.
The “Love You” layer is found on p. 22 of the
handbook. Pop-dotted both the layer and
flower layer.
Added glitter butterfly and flower stickers.
The inside of the card is the frame found on p.
33 of the handbook.
The sentiment was computer-generated and punched
out w/ the Real Estate punch.
Corner-rounded the corners of the card.
Labels:
Anniversary,
Cards,
CI - Lori's Garden,
Projects
Thursday, September 13, 2012
Thank You card
Made this card for my dear, sweet
cousin to thank him for my birthday gift.
He loves to play the guitar so I made the card, w/ “me” playing the
guitar; hence, a foxy lady strummin’ a . . . thank you! J
Tools/Items:-
Cricut Imagine
Cricut Imagine Cartridge -- Ancestry
Cricut Cartridges: see below
Cardstock -- white (for the Imagine)
Glue – ATG; Zig Two-Way
Rhinestones
Cricut Cartridges:
Birthday Bash -- fox and layers
Phrases – Thank You and layers
I used the same pattern from the
Ancestry cartridge for both the card base and the background of the
sentiment. I love how the Imagine scales
the patterned design to the size of the image.
Even tho the card inside had the
star jutting off the sides, I decided to cut them off. I had no plans of putting another star
inside, so I thought it looked a lot nicer w/out.
I utilized the RGB codes for the color of the star, to use as a background for the sentiment.
My cousin loved his card, which put a huge smile on my face!! J
Labels:
C - Birthday Bash,
C - Phrases,
Cards,
CI - Ancestry,
Projects,
Thank You
Saturday, September 8, 2012
Washi Tape give-away WINNER announced
Hiya!
Now to announce the winner of the Washi Tape give-away.
Drum roll, please. . . . . . .
And the winner is:-
Diane has been contacted via e-mail. Congrats, Diane!!! Enjoy your Washi Tape!!! :-)
Now to announce the winner of the Washi Tape give-away.
Drum roll, please. . . . . . .
And the winner is:-
Diane has been contacted via e-mail. Congrats, Diane!!! Enjoy your Washi Tape!!! :-)
Subscribe to:
Posts (Atom)
FeedJit Live Traffic Feed
Thank you for visiting ladybug
Birdie thank you